Showing posts with label Sure Cuts a Lot. Show all posts

Friday, November 26, 2010

Sorrowing with You...

Why is it that the most important cards are the hardest to make?  I found out a few days ago that a sweet beautiful girl that used to live next door to us passed away unexpectedly.  I used to babysit her and her siblings all the time, and my heart is just breaking for her family.  Her funeral is tomorrow, so I wanted to make a card to take along. 

What strategies do you use for making "tough" cards like this one?  It's fun to make birthday cards and baby cards, but at the times when you most need to communicate love and support, it's harder to get what you're feeling onto paper.  I wanted to make something simple but still beautiful, and I also wanted to communicate something of how beautiful I thought this sweet girl was.  That is why I added the little butterfly with the pearl on it -- it's a detail that might not ever be noticed, but it means something to me.

On to the nitty gritty -- I used this week's CPS Sketch as my jumping-off point.  I embossed the background with my Cuttlebug, using a folder from Quickutz.  The stamps are from Stampin' Up, the ribbon is from Fancy Pants, and the butterfly is a cut file I designed myself and cut in Sure Cuts a Lot.

I hope you all had a wonderful Thanksgiving!  Times like this remind me just how much I have to be thankful for, and how much others need our prayers in so many ways.  Blessings to all of you!

Sunday, April 4, 2010

Happy Easter!

Happy Easter, friends!  I hope your day is wonderful and that you take a moment to consider the great blessings our Savior Jesus Christ has brought into our lives.

Here's a little Easter treat I made yesterday for a little gift swap we were having for our girls' night last night.  I was inspired by this cute project over at my friend Tonya's blog.  Since I'm not eating any chocolate this Easter , this little guy will have to satisfy my cravings.  I found a picture of a chocolate bunny online and then turned him into this shape for SCAL.  He turned out so cute I hated to give him up!  I think I may make another one for myself next year!

Materials:  PP -- Crate Paper; ribbon -- Stampin' Up (wide) and Bazzill (narrow); button -- Sassafrass Lass; Diecuts -- Cricut George cartridge (flower and tag), SCAL (Fontleroy Brown font and my bunny shape)

Wednesday, December 30, 2009

No Empty Chairs -- Decorative Plate


Hello, all!  I hope you're all starting to recover from the hustle, bustle, and fun of the holiday season, and that you had a wonderful and special time with your families.  We were busy, busy, but we had a wonderful time together.  And now I finally have a few minutes to start posting a few of my projects!  This first one is a decorative plate I made for my wonderful mom for her birthday.  The idea of "no empty chairs" came from a talk from Elder Henry B. Eyring, one of the leaders of our church, and it means that we want to have all our family together in Heaven.  My mom loved it so much she asked to have it engraved on her headstone, but I didn't think she should wait so long to enjoy it... :)  I bought the brown charger from a local home decor store, then I designed the vintage chair and flourishes and used SCAL to cut them out of gold and cream vinyl with my Cricut. 

Tuesday, April 14, 2009

You're My Favorite


Yesterday marked one year since the death of my sweet little sister Carissa. For those of you who didn't know (or know of) her, she was an angel. She had Down's Syndrome, and she radiated a true spirit of Christ-like love. She always told everyone "You're my favorite!" And she meant it each time. My younger sister Amy declared April 13th to be "You're My Favorite" Day, a day when each of us could really focus on letting everyone around us know why we love them and why they're our favorite. I made this card for my parents using this week's 2S4Y sketch. I used Chattebox paper and an artisan label I designed myself then cut using SCAL and my Cricut. Oh, I also cut flowers using the George cartridge and added a Fancy Pants flower and a big American Crafts brad. TFL!

Thursday, March 5, 2009

Ready for Swuimsuit Season?


I had SO much fun making this card! I meant it as a tongue-in-cheek card for a friend, but I think I'm going to keep it and post in on my fridge to discourage late night snack raids... I dug out a bunch of fun vintage-y scraps from my bins and went to town. The swimsuit and dress form are more of my own designs using my Cricut and Sure Cuts a Lot (available in my etsy shop), and the pp is from Scenic Route. I'm not sure where the twill tape is from -- I got a couple yards of it at my favorite LSS a few years ago and this is the first time I've actually used it! The ruffly scallop border is a neat trick I learned from my friend Brooke Stockman -- it's a bunch of scalloped circles layered and then bent outwards for texture and depth. So cute!


Check in over the next few days -- my blog just made it to 40,000 hits, and I'm going to celebrate with some fun blog candy!

Wednesday, March 4, 2009

For the Bride - 2 Sketches 4 You & a new cut file too!


For this week's 2 Sketches 4 You challenge, I decided to use the new vintage dress form cut file I just created. I love the look of these dress forms and had so much fun designing different outfits to put on them. So far I've done this fancy dress, a vintage swimsuit, and a cute apron -- you can see them all in my etsy shop. For this card I used Wild Asparagus paper, and I stitched around the edges, and the lace is from a JoAnn bargain bolt. I cut the photo corners with my Cricut and the Jasmine cartridge at 2" on real dial size. I used a white uniball signo pen to write "for the bride." TFL!

I have to give a shout-out to my fabulously talented friend Sonia at Scraps4Fun -- she has a great blog with amazing projects. She recently had a blogging disaster and lost a lot of her data, but she's having a HUGE re-launch party with awesome blog candy. Can you say $50 of scrapping goodies?! Go check it out -- you'll definitely want to become an official follower.

Monday, March 2, 2009

I love the smell of new goodies in the morning...

There is something so inspiring about having new crafting goodies! For my birthday this year I had a little Stampin Up shopping spree and got a TON of the cutest stuff -- yippee! I've been so inspired by having all this great new stuff, so here are a few of the projects I've been dying to show you. Thankfully, my mom found my camera tucked into the pocket of an apron in her pantry -- oops. As Sammy said upon hearing the news: "She gets the dollar!"


This first one was a Valentine's Day project. We went to a church dinner dance, and I was in charge of decorating one of the tables. I had these cool dishes from IKEA, and I thought these little boxes went so nicely with them. Thanks, Brooke, for showing us how to make these at the party! The boxes are SO easy to make -- if anyone is interested I can post a video tutorial. I used the Manhattan stamp set for the flowers, the Curly Label stamp and punch for the label, and cut the "love" with the Cricut Opposites Attract cartridge at 1". I also used CDS and the George cartridge to cut out these hearts from red vinyl to apply to the glasses.


This one is from the 2 Sketches 4 You sketch from two week's ago. The pp is from Sassafrass Lass, and I used my own design and cut file for the notebook journaling spot (which I'll be putting up in my etsy shop when I'm finished here). I used my new "Little Leaves" and "Buttons #5" dies for the branch and buttons. The dotted lines are a jumbo stampin' wheel, named (appropriately) Dotted Lines, and the sentiment is from the "Sweet Little Sentiments" set.


Here's last week's 2S4Y sketch, which I rotated 180 degrees. The pp and stamps are from the "It's a Loop Thing" Sale-a-bration set (one of the best things about my party was that I got one of every single thing in the Sale-a-bration catalog FREE!). Oh, the sentiment is also from "Sweet Little Sentiments" set. I pieced the cupcake by hand. For the top part I just cut a circle in half, then used the SU scallop edge punch on the straight edge. I ran the bottom part through my paper corrugater to give it that cupcake-like texture. I made the cherry using the heart stamp from the set, and added CTMH liquid glass for a little shine.


This last card uses the "Thoughts and Prayers" set, which I think is SO pretty, which I colored with the Stamp and Write markers. I couldn't decide which background to use, so I just did one of each. The first one is embossed with the Cuttlebug text folder, and the second I did a little versamark stamping with the same floral branch stamp. Just a simple card, but I thought it turned out pretty.

Phew! Now that I have my camera back, I should be able to post projects more regularly. I still have 6 new SU sets I haven't even opened, so stay tuned! TIA!

Monday, February 16, 2009

Layouts at last!

I've been doing mostly cards and gift projects for quite a while, so I was so happy to get a few scrapbook layouts done. These three layouts are so different; it really makes me appreciate how scrapbooking can help us record so many different parts of our lives.

This one is me and my parents when I was right around one! I snagged this picture from my grandma's house when passed away, and it just makes me happy. I did this layout as a gift for my dad's birthday -- I started last year when I made him a layout and gave it to him in an 8 1/2 x 11 frame. This year I gave him a binder so he can put last year's layout in the binder and have this one in the frame. That way I know he'll look at it more! :) The size also makes it easy for me to make copies for myself. I'm planning on making lots more "blast-from-the-past" type layouts in the future.


Materials: PP -- SEI; letter rub-ons -- American Crafts; title letters -- CAC One Seventy font, cut with Cricut and Sure Cuts a Lot; ticket corner and scallop edge punches -- Stampin Up; Flower punches -- EKSuccess; Tab -- Cricut (Fab Finds)

I love the story behind this second layout -- just one of those little everyday funny stories that NEED to be scrapbooked! When Sammy was a couple months shy of 4, we were meeting my BIL Chad's girlfriend for the first time. He was 31 and his lack of success in the romance department up to that point was becoming a real sore spot with him (not to mention with my MIL and his grandma!). When Chad introduced Esther to Sammy, he looked at her in disbelief and said, "Esther, I thought you were IMAGINARY!" Yup, had to get that one down for posterity! This photo is from that weekend.


Materials: PP -- Scenic Route; Stamp -- Stampin Up (dotted line jumbo roll); acrylic arrow -- no idea

This last layout is not my favorite ever, I have to admit. I don't think I've ever made a Halloween layout I really loved. But this is the fun event type scrapping that I've been neglecting lately, so I was glad to get it done. It's also the last Halloween we had my little sis Carissa (that's her dressed as Princess Fiona), and she LOVED Halloween and trick-or-treating with her nephews, so I couldn't skip those pics!


Materials: PP -- K&Company; Glitter stickers -- Martha Stewart; Glitter -- Provo Craft; Title Letters -- Cricut (Printing Press)

I was going to show you some fab decorations I made for our Valentine's Dinner using my new Stampin Up goodies, but I left my camera at my mom's house. ARGH! So stay tuned -- more good things to come!

Saturday, January 31, 2009

Quilt Block Card


I needed a get-well card for a friend who is an avid quilter, and creating a quilt block card was the first thing that jumped to mind. I used mostly circles and squares, then designed a layer to coordinate (the green bits) and cut it using my Cricut and SCAL. This week's sketch over at Mojo Monday was the perfect jumping off point for this large quilt block! The paper is from Crate Paper, and I hand lettered the sentiment. TFL!

P.S. If you're interested, I've listed my quilt block cut file and piecing instructions in my etsy shop. Thanks!

Blog Candy Alert!! There is really great blog candy going on at the following blogs:

Gramma's House of Cards

Going Buggy

Plus all sorts of great inspiration, so check 'em out!

Monday, January 26, 2009

A whole stack of stampin' cards...

It's been far too long since I posted a new card -- I've been busy, busy this month! I turned the big 3-0 and had lots of fun with my family and friends celebrating the big event. This past week, I've finally been able to make some cards. Hooray! (Mom, if you're reading this, don't go any further, because one of these is for you...) This one is my favorite -- it's an engagement card for my little brother and his new fiance. The pp is from Sassafrass Lass and the stamps are from the Stampin Up Love Matters set. I colored the letters with PrismaColor pencils and blended with Gamsol. The artisan label is my own design, cut with SCAL and my Cricut (the cut file is available in my etsy shop!).

09 01 25 January cards 008.JPG

The following two cards I created for the 2 Sketches 4 You Spring Design Team call. I wasn't going to enter, but I liked the sketches so much I decided to just go for it. I think I emailed in my entry about 5 minutes before the deadline Saturday night! I just got these Stampin Up sets from my friend Tammy for a really awesome deal (thanks again, Tammy!) and I'm having so much fun playing with them. This first one uses the Love Matters set and that same artisan label again, as well as a 5 1/2" scalloped square from the Cricut Mini-Monograms cartridge:


This one uses the "Pick a Petal" set and a JoAnn's metal rim velum tag. I created the scalloped border for the tag using my Cricut and Design Studio. The little tab at the top is from the Cricut Fabulous Finds cartridge, cut at 1". "hi" is from the Cuttlebug "Typewriter" alpha.


These last two are quick cards that I made several of each as thank you's for Christmas and birthday presents. The one on the left uses Stampin Up cardstock (last year's In Color combo) and a cool set of acrylic stamps my mom gave me for my birthday. Their from Inkadinkadoo and came in a huge set of 130 stamps! I'm pretty sure she got them at Costco. I cut the circle and scalloped circle with the Mini-Monos cartridge, and made the scalloped border with my Fiskars Threading Water punch. The little flower is an EK Success punch.

The card on the right uses Chatterbox paper that I've had in my stash for years and a Stampin Up block party stamp, along with another EK Success flower punch for a quick embellishment.


I've started listing some of my cut files in my etsy shop! If you have SCAL for your Cricut, be sure to check them out. I think they'll also work for the Pazzles and Wishblade, but I need to learn more about that. I'll be making a big announcement and offering some fun blog candy once I get more files ready to go, so stay tuned!

Friday, January 9, 2009

Bits and Pieces

I realized I never did show the fun projects I made as Christmas presents. This first one is my favorite -- The quote slips into photo corners, and there's an envelope on the back of the frame with a bunch more quotes so my SIL can change them out from time to time. I love how it turned out! I started with a $1 frame from Michaels, then used Basic Grey paper -- LOVE this Ambrosia line -- Fancy Pants chipboard, and a Making Memories Pin. The butterfly is cut from some of the PP. I designed the quote on my computer.


>


My second project was something special for my mom and dad. This is to hang by a pretty tile portrait of my sister Carissa, who passed away last spring. I took an MDF plaque, spray painted the bottom layer with gold, then added crackle finish before applying the cream layer. I love the effect of the gold peeking through the cream. I cut the vinyl with my Cricut and Sure Cuts a Lot.

It's no secret that I love a challenge blog -- it seems like the only time I get projects done is if I have a deadline! And thanks to my new scrappin' friend Brooke Stockman (whose blog is very much worth checking out on its own), I've discovered two new blogs I'll definitely be participating in:

Mojo Monday -- a new card challenge every Monday, with prizes the first Monday of each month

Cinema Saturday Creative Challenge -- weekly challenges using great movies as inspiration. I think this one will really get my creative juices flowing!

Tuesday, January 6, 2009

Miss You -- Kazan Sketch #17 at 2S4Y


Another week, another lovely sketch from 2 Sketches 4 You! I decided to let the big flower make the major statement on this card, and I used chalk ink to grunge it up to go with the pp. A little stitching and a hand-written label (which I cut using my own design on my Cricut machine) finish it off. TFL!

Materials:
PP -- Scenic Route
Lace Trim -- Fancy Pants
Flowers -- Heidi Swapp (large), Fancy Pants (small)
Cardstock -- Provo Craft
Chalk Ink -- ClearSnap (Cat's Eye)
Brad: unknown

Thursday, December 11, 2008

2 Sketches 4 You -- Kazan #15


It's been weeks since I had a chance to play along with 2 Sketches 4 You, but this sketch was so perfect I just couldn't miss another week. I designed this cute little owl and turned her into a cut file for my Cricut using SCAL -- LOVE IT! I think on the inside it will say "Whooo's the birthday girl?" or some other cute owl-y saying.


Supplies:
Cardstock - Bazzill
PP - DCWV (text), Chatterbox (plaid and stripe)
Buttons - Unknown (pink) and Autumn Leaves (everything else)
Punch (flower) - EKSuccess

Thursday, December 4, 2008

My first acrylic album


Wow, I can't believe it's been a whole month since I had a chance to post! It's been crazy around here -- two siblings got married, Thanksgiving, a craft fair, plus every day life!

My favorite current project is this acrylic album -- I've been wanting to try one of these forever, and I just love how it turned out. It was a fun challenge, having to think about how each page would look layered with the others instead of just taking one page at a time. This album is about Eliza's baby blessing and the beautiful dress that my dh's mom and grandma made for her. In our faith we don't believe in infant baptism, but we do gather together as a family for the father to give the baby a special blessing. Dan's mom and grandma put so much work and love into this dress, I wanted something special to honor that. The album itself is from Scrapworks, I believe, and the paper is from Fancy Pants. I used a Sizzix flourish die, and the flowers are my own design, cut with my Cricut machine and SCAL. I also added some rhinestones and ribbon. So sweet! TFL!


Monday, November 3, 2008

BBTB Scrapnfonts Challenge!


Another fun Christmas project for you! This week at Bitten By The Bug our challenge was to use the Christmas card from the Christmas Cheer cartridge along with a great font (SNF Classy Charm) and doodlebat (Tis the Season Modern) set from Scrap-n-Fonts. I used SCAL to cut the big snowflake from the doodlebat set and "JOY" from the font -- I LOVE having SCAL and being able to do that! I cut them from chipboard and covered them with white glitter, then added the cute little Santa from Christmas Cheer (he's cut at 2"). The papers are from Pebbles, Inc (the same collection I used on the nutcup project last week). So festive! TFL!

Saturday, September 20, 2008

2 Sketches 4 You -- Kazan #9


Better late than never! I've been working on this card in 5 minute increments all week -- man, I've gotta get in a new rhythm with the new baby so I can get some crafting time!

Kazan's sketch this week was too good to pass up, so I was excited when my sweet little sister-in-law got engaged and gave me a good excuse to use those 5 extra minutes a day on a card instead of laundry! She has a bright, fun personality, and I though this funky Sassafrass Lass paper was perfect for her. The heart-flower stamp is from Art Warehouse, and I used Prismas and Gamsol for the coloring, and I added some green ice Stickles to the center and leaves. I cut the background shape with my Cricut and SCAL.

Phew! So glad I got something created this week!

Friday, August 1, 2008

Family Fun -- layouts for our family album


I'm the only scrapbooker in my family (not for lack of trying to convert my mom and sisters, though!), so when I do pages of big family events, I scan them in and get copies printed for everyone in the family (Costco is a great resource for this, btw). I started doing this when my little sister went on a mission for our church, so she would have something fun when she was homesick, and also so she could introduce people to our happy, goofy family. Now that more people are growing up and spreading out, it's more important to me than ever. I love it! I scrap in 12x12, generally speaking, but the books I made for everyone else are 8x8 -- it's just easier and cheaper to print and ship all the pages that way.

My little brother Eric is just as camera happy as I am, and when we are both on a trip we end up with mountains of pictures -- hooray! He's also a very talented photographer, which is why some of these pictures are super nice and some are just run-of-the-mill (those would be mine...) That just leaves me with the dilemma of which to pick, so I always need a lo with tons of picture space. I couldn't do it with just one double-page lo in this case, so I did two almost identical layouts for the book.

I like to coordinate the colors of the pictures with paper and embellishments, but in this case nearly every pic had different colors! I also wanted something that reflected how much fun we had on this trip. I found this great striped paper in my stash (by My Mind's Eye, Magnolia stack) that definitely fit the bill. But I didn't want it to clash, so I mounted the photos on kraft paper (which reminded me of the sand on the beach at the lake). I also added some decorative stitching and used my Heidi Swapp edge-distressor on the kraft paper (love that tool!). The flowers are cut from some coordinating pp, and the title is cut with the Cricut Base Camp cartridge. I cut the journaling block with SCAL. TFL!

Wednesday, July 23, 2008

All sorts of goodies...

I have been busy-busy getting ready for the boutique on Saturday. It's my first try at actually doing something as a Memory Works rep, so I wanted to make it a good one. I chose a few of the collections and tools from the new catalog and decided to show just how many projects you could make with each the thing. Here we go!

From the Cosmo Cricket "Honey Pie" set:

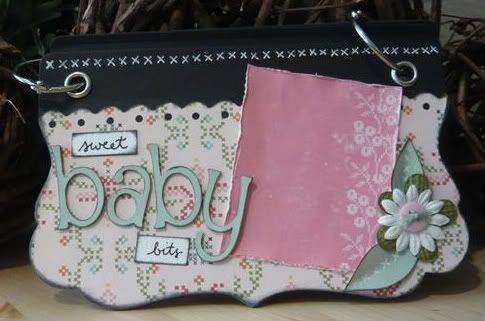
This one also uses a "blackboard" album from Cosmo Cricket, Prima flowers, and "baby" is cut with the Alphalicious cartridge. I did the scallop edge with Threading Water. The inside pages are covered with paper, but no pictures because it's waiting for baby Eliza! (You'll notice this is a common theme with all these girly things.)


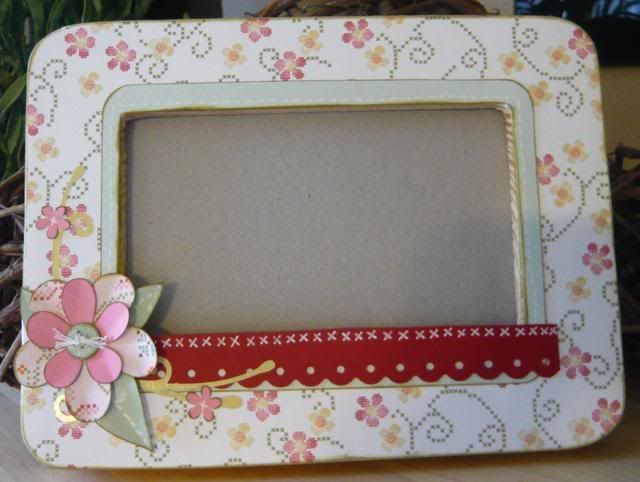
This altered frame is something I made for a challenge at the Cricut SWARM this past weekend. The flowers are from the George cartridge and the swirly thing in the background is from Joys of the Season.


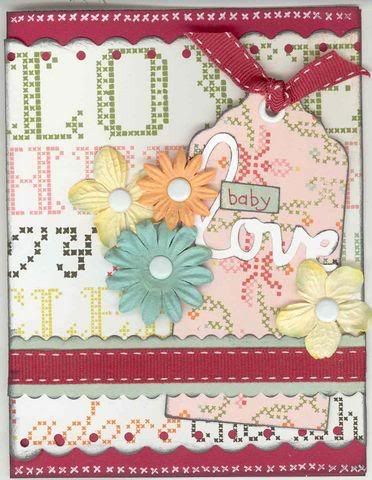
I did this layout at the SWARM as well -- I love it when things come together quickly! I usually don't do layouts before I have pictures to put in them, but I'm sure I'll have lots of material once this baby makes her appearance!


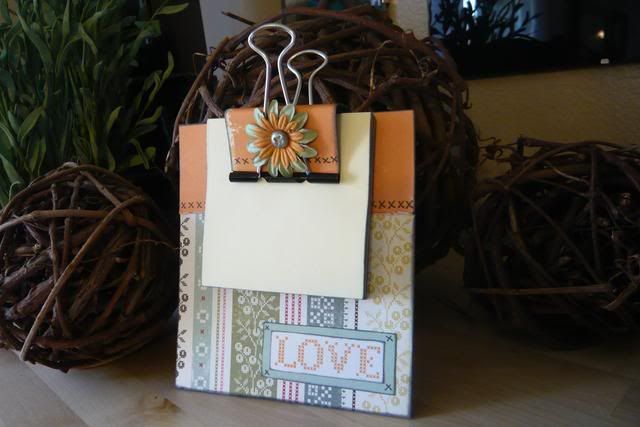
This cute post-it note holder was our make-and-take at the SWARM.


I've posted this card before, but it goes with this set:


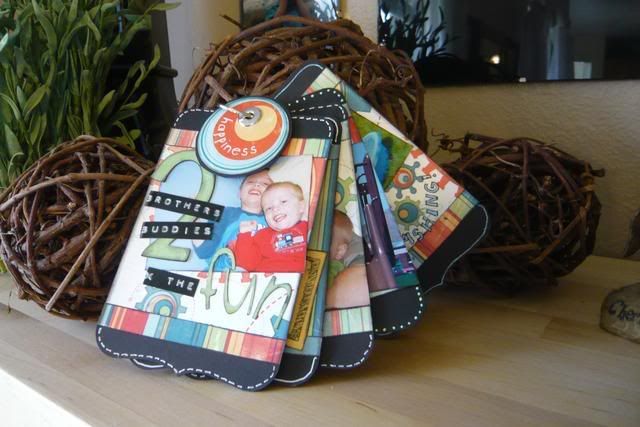
The next few projects are from the Cosmo Cricket "Cogsmo" line -- I just love the cute little robots on this paper! I'm still going to make a card or something with this collection.

This mini-album is another "blackboard" album from Cosmo Cricket. I gathered a bunch of fun pictures of the boys together that probably wouldn't have made it into other layouts -- just everyday stuff, but so fun! I cut the letters here from Zooballoo.


Here's a layout with the same papers, about Sammy's first "book."


And these are from the Autumn Leaves "Cuteworld Girl" set -- I can't even tell you how much I love this paper! So exciting to be able to do all these girly things! I've only used a few sheets from this set so far. I think tonight I'll make a card or two to go along with these.

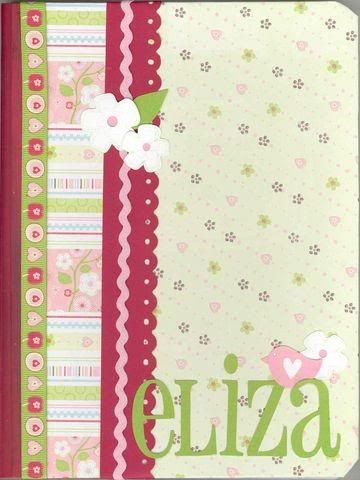
A baby book for Eliza! I also used WIMG for the flowers, and I drew the little birdie with my pen tablet and cut it out with SCAL. "Eliza" is also done with SCAL.


This layout was super quick, very possibly my fastest ever! The big flower came that way in the paper set. I came together so fast, in fact, that I took a few extra minutes to add the new Doodlebug crushed velvet flock to the flower and leaves. It's hard to see here, but it's really cute IRL.


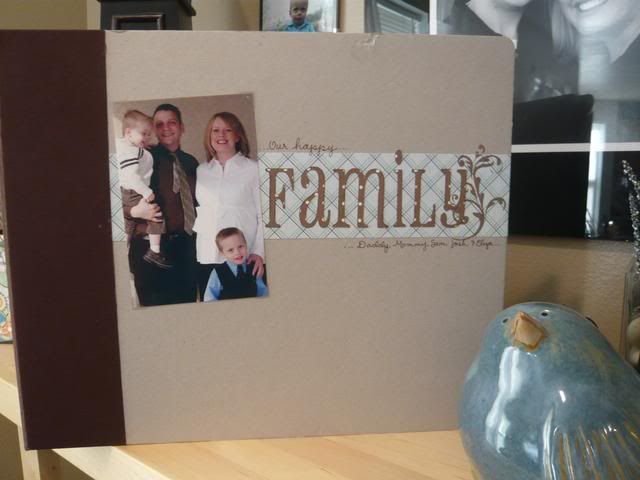
I also altered the front of this American Crafts album:


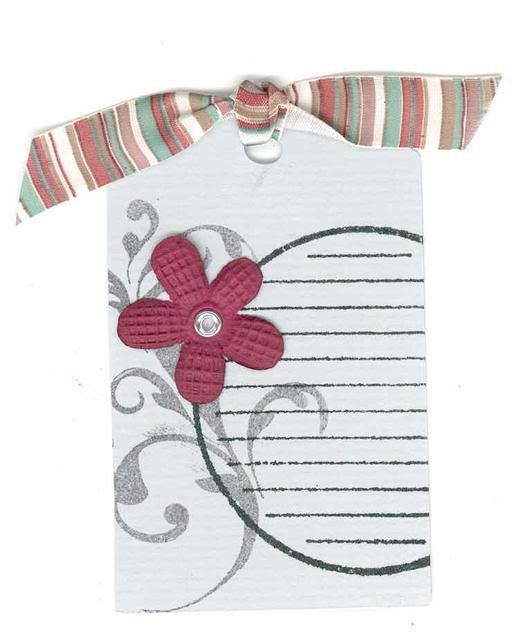
And, last but not least, this is the make-and-take I'll be doing. They'll be able to try two different stamps (both from Autumn Leaves), Primas, and the Cropadile, all things in the catalog. I think I'll ink the edges of the tag. I've never done a make-and-take before, but I wanted to make sure it was something quick and easy. What do you think?

Friday, June 27, 2008

Another SCAL creation...


I created this layout a while ago, but I was submitting it for a contest and couldn't post it. I'm posting it now to show one of my favorite things I've done with SCAL so far -- I created this cut of the Space Needle! I searched for a while and couldn't find any dingbats or anything of the Space Needle, so I found a good picture online, copied it into my graphic design software, and created this shape. I also cut "top" with a font called Pristina. Man, the possibilities with this software really are endless!

Oh, and I also must thank Diane (Capadia from the Cricut MB) for this great scallop file for Cricut Design Studio. It works like a charm, so if you have CDS and you like the look of the Threading Water punch, this is a great file!

This is for an 8x8 album I do with layouts just of me and my hubby. I love it, because it not only celebrates all the fun things we do together and the love we have for each other, but I also get to use all the "grown up" supplies I have! This one uses some of my favorite papers from Scenic Route, and a sketch from Page Maps.

Monday, June 2, 2008

My birdie obsession continues...

Okay, I think my love for little birdies may be going overboard! Just about every card I've made lately has some little birdie element. They're just so dad-gum cute, don't you think? So much fun!

This one used scraps from my "Lucky" layout from last week. This cute birdie is from the Cricut Joys of the Season cartridge -- it's a Christmas cartridge, but I think it's extremely versatile -- cut at 2". I used it for my Mother's Day cards, as well. The flourish the birdie is sitting on is also from JOTS, cut at 2" on shadow. "Thank You" is cut with Alphalicious, I think also at 2".


This simple card is a favorite layout of mine -- it comes together so quickly; it's great when you need to make a big batch of cards. The color scheme here was inspired by some lotion packaging I saw at Old Navy. I'm not sure how I feel about the black inking on the embossing, but I do love this little birdie embossing folder for the Cuttlebug. The stamp and scallop circle are from Stampin Up.


Here's another one with the same embossing folder, but the photo so does not do it justice because it really doesn't pick up the embossing on the white cardstock, but the card is so pretty and delicate. This one uses another stamp from the same SU set, and the scallop circle punch. I also used the Fiskars Threading Water Punch for the scallops on the bottom -- I love it!


I picked up this adorable Imaginisce penguin stamp for less than a dollar and decided he would be perfect for making some fun, fresh Father's Day cards for my grandpas this year. (I usually end up doing something "masculine" with lots of blues and browns, but my grandpas are all pretty fun guys and I think they'll enjoy this even more!) I used watercolor pencils for the green and orange, and blue craft glitter for the popsicle and swirls.


This one is for my aunt and cousin who are traveling to England even as I type. This little birdie is a Quickutz die that followed me home from the craft store on Friday. "bon voyage" is from the Cricut Beyond Birthdays cartridge, and the journaling block is something I designed myself and cut with SCAL. I love this shape, which is so popular right now, but I didn't have one on any of my cartridges and I couldn't find one as a dingbat. I LOVE that SCAL gives me the flexibility to do it myself! Recognize the paper? It's scraps from the penguin father's day cards! Just goes to show how versatile a couple of pieces of paper can be!