Showing posts with label mini-albums. Show all posts

Monday, February 21, 2011

A different take... (Two mini-albums!)

I have two fun projects to share with today using the Cricut Spring Cards cartridge, courtesy of ScrapbookPal.com!  I had a lot of fun making Valentine's cards and goodies with the cartridge, but I couldn't wait to use it for the great frame and envelope shapes!  I had two ideas for projects, so I decided I'd better just do them both.  :)


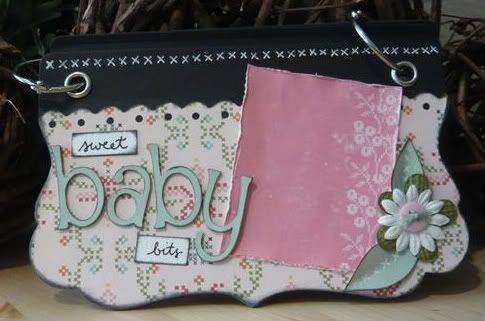
My first project was a mini-album made with envelopes.  I have a growing stack of little notes from my wonderful hubby and I've never been sure what to do with them.  An envelope album is the perfect solution!  I cut 6 envelopes, using my Gypsy to make them as large as possible on a 12x12 page.  Each envelope is about 5 1/2" wide and 7" long, which makes it perfect for small notes, cards, and 4x6 pictures.


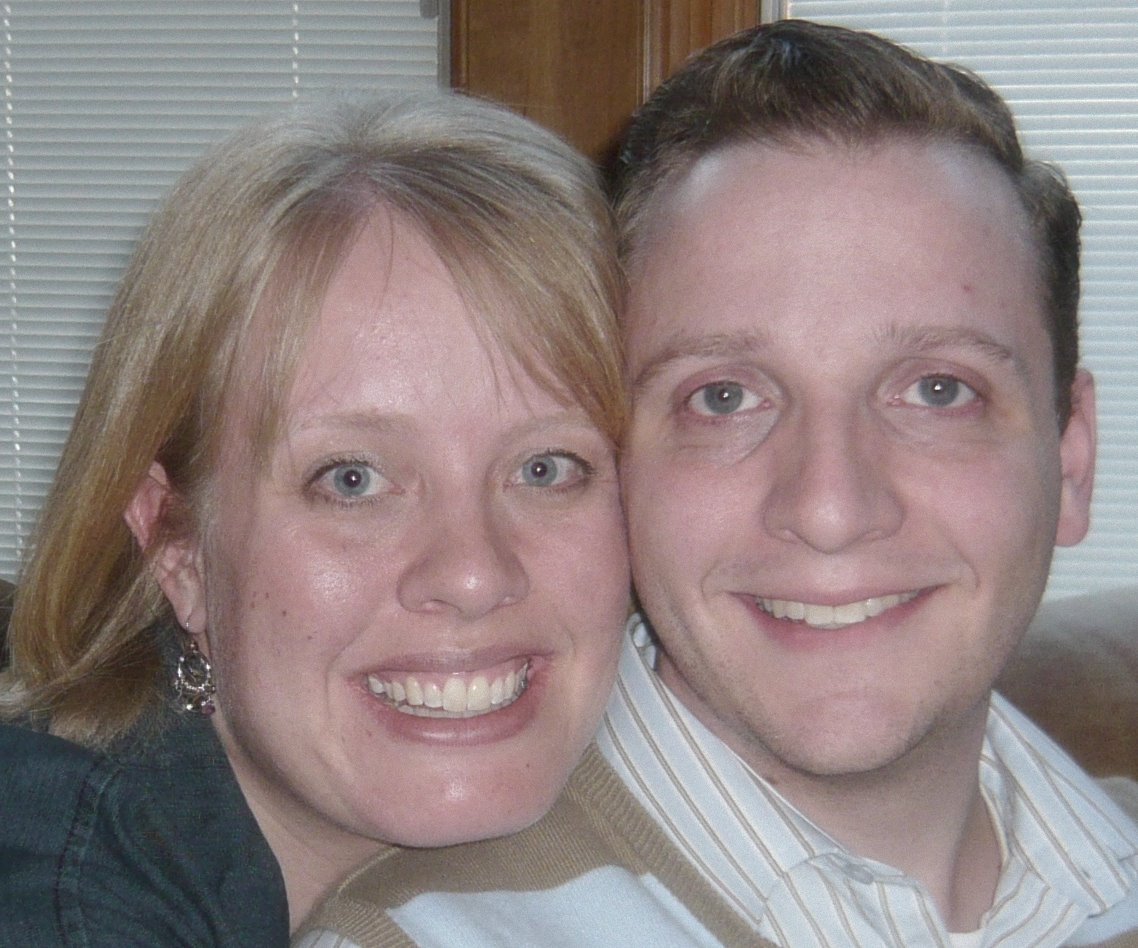
I used my glue gun to put the envelopes together so they'd be nice and sturdy.  I used Basic Grey magnetic snaps to create closures for each envelope.  I added my favorite picture of the two of us to the front envelope along with some rolled roses and a label from the Home Decor cartridge.  For "love notes," I used my white GellyRoll pen -- I'm really impressed with how this is holding up over time!  I punched holes in the corners of the envelopes and used binder rings to bind them together.

The pleated border along the left-hand edge is my favorite touch.  I simply cut a 1" wide strip of paper, then punched a scalloped border.  I pleated it all higgledy-piggedly, then inked all the edges to make them stand out.  A strip of velvet ribbon was a perfect finishing touch.


This kind of thing is a great project for that collection of paper that you've been hanging on to for years because you're not willing to part with it.  I've had these papers in my stash forever but I loved it too much to turn it into cards to give away.  Random readers may think I'm crazy, but I know you papercrafters know exactly what I mean and could immediately point to the same thing in your own stash!


Materials:  Die Cuts -- Cricut Spring Cards and Home Decor cartridges; Patterned Paper -- Crate Paper "Prudence" collection; Large rhinestone brad -- Karen Foster Designs; Small rhinestones -- Imaginisce iRock; Velvet Ribbon -- We R Memory Keepers


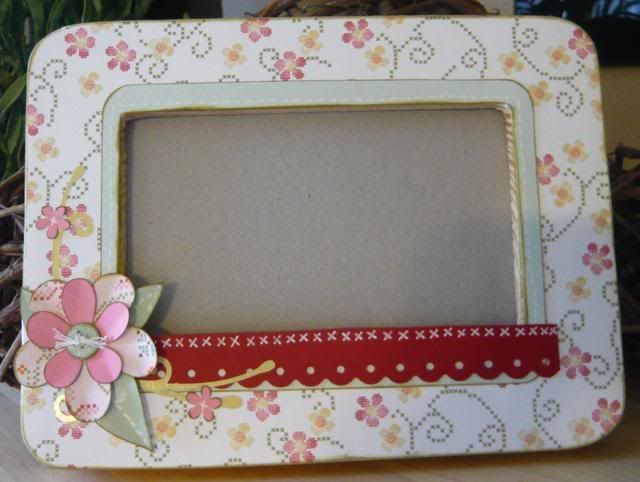
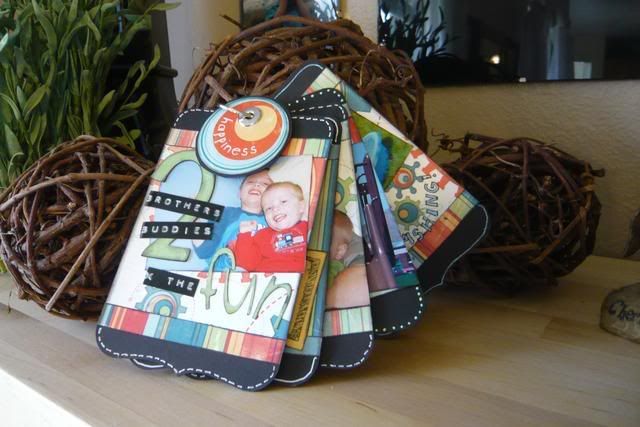
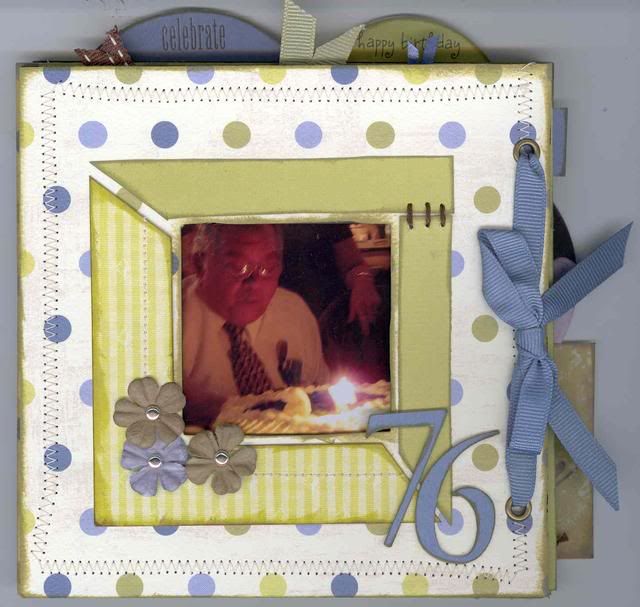
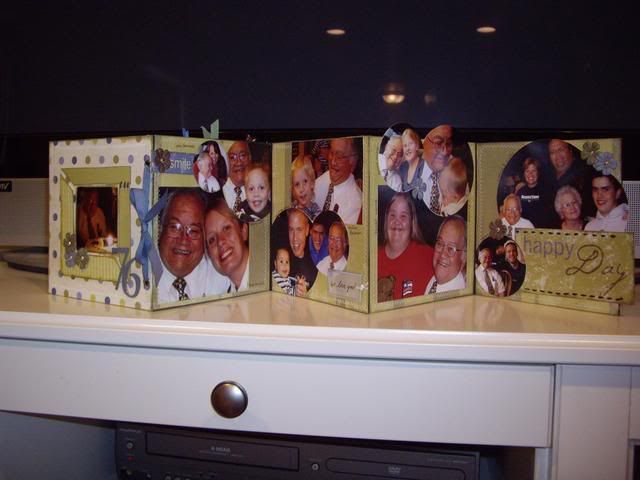
 My second project is a gift for my Dad's birthday!  I thought the card background shapes on the Spring Cards cartridge would also work great as photo frames, so I made a cute little flip album of my dad and all his grandkids to take to the office.  I started with this simple standing frame from IKEA, then sized the shapes on my Gypsy to the maximum width for the frame.  In retrospect, I wish I had stretched them a little taller as well.


I cut a few pages worth of frames (enough for the pictures I had and some blank ones to add more pictures in the future) and inked all the edges.  I trimmed the pictures to fit and then just slipped them into the slots already cut into the shape.  I also cut out and decorated a frame for the cover of the album, using my white UniBall Signo pen for the detail on the heart and the letters in "little."  I punched holes in all the pages and used binder rings to attach them to the frame.  I used hemp twine and a few other bits and bobs to decorate the frame to match the album.


Materials:  Die Cuts -- Cricut Spring Cards, Lyrical Letters ("bapa's buddies"), and George (heart) cartridges; Frame -- IKEA; Binder rings --  7 Gypsies; Patterned paper -- Chatterbox; Acrylic letter and chipboard heart -- Heidi Swapp; Ric-rac -- Fancy Pants

Thursday, December 4, 2008

My first acrylic album


Wow, I can't believe it's been a whole month since I had a chance to post! It's been crazy around here -- two siblings got married, Thanksgiving, a craft fair, plus every day life!

My favorite current project is this acrylic album -- I've been wanting to try one of these forever, and I just love how it turned out. It was a fun challenge, having to think about how each page would look layered with the others instead of just taking one page at a time. This album is about Eliza's baby blessing and the beautiful dress that my dh's mom and grandma made for her. In our faith we don't believe in infant baptism, but we do gather together as a family for the father to give the baby a special blessing. Dan's mom and grandma put so much work and love into this dress, I wanted something special to honor that. The album itself is from Scrapworks, I believe, and the paper is from Fancy Pants. I used a Sizzix flourish die, and the flowers are my own design, cut with my Cricut machine and SCAL. I also added some rhinestones and ribbon. So sweet! TFL!


Wednesday, July 23, 2008

All sorts of goodies...

I have been busy-busy getting ready for the boutique on Saturday. It's my first try at actually doing something as a Memory Works rep, so I wanted to make it a good one. I chose a few of the collections and tools from the new catalog and decided to show just how many projects you could make with each the thing. Here we go!

From the Cosmo Cricket "Honey Pie" set:

This one also uses a "blackboard" album from Cosmo Cricket, Prima flowers, and "baby" is cut with the Alphalicious cartridge. I did the scallop edge with Threading Water. The inside pages are covered with paper, but no pictures because it's waiting for baby Eliza! (You'll notice this is a common theme with all these girly things.)


This altered frame is something I made for a challenge at the Cricut SWARM this past weekend. The flowers are from the George cartridge and the swirly thing in the background is from Joys of the Season.


I did this layout at the SWARM as well -- I love it when things come together quickly! I usually don't do layouts before I have pictures to put in them, but I'm sure I'll have lots of material once this baby makes her appearance!


This cute post-it note holder was our make-and-take at the SWARM.


I've posted this card before, but it goes with this set:


The next few projects are from the Cosmo Cricket "Cogsmo" line -- I just love the cute little robots on this paper! I'm still going to make a card or something with this collection.

This mini-album is another "blackboard" album from Cosmo Cricket. I gathered a bunch of fun pictures of the boys together that probably wouldn't have made it into other layouts -- just everyday stuff, but so fun! I cut the letters here from Zooballoo.


Here's a layout with the same papers, about Sammy's first "book."


And these are from the Autumn Leaves "Cuteworld Girl" set -- I can't even tell you how much I love this paper! So exciting to be able to do all these girly things! I've only used a few sheets from this set so far. I think tonight I'll make a card or two to go along with these.

A baby book for Eliza! I also used WIMG for the flowers, and I drew the little birdie with my pen tablet and cut it out with SCAL. "Eliza" is also done with SCAL.


This layout was super quick, very possibly my fastest ever! The big flower came that way in the paper set. I came together so fast, in fact, that I took a few extra minutes to add the new Doodlebug crushed velvet flock to the flower and leaves. It's hard to see here, but it's really cute IRL.


I also altered the front of this American Crafts album:


And, last but not least, this is the make-and-take I'll be doing. They'll be able to try two different stamps (both from Autumn Leaves), Primas, and the Cropadile, all things in the catalog. I think I'll ink the edges of the tag. I've never done a make-and-take before, but I wanted to make sure it was something quick and easy. What do you think?

Friday, April 11, 2008

Board book baby-album & coordinating card

This project combined two of my favorite things -- board book mini-albums and coordinating papers! Both make it so much easier to make beautiful gifts. I was able to make this whole project and card from the book, three sheets of patterned paper, and one sheet of brown cardstock, with enough leftovers at least a couple more cards. Since I got all of this on sale at one point or another, the total cost of materials was very low. I love this Crate paper for a baby girl. I used the Cricut Stamped cartridge for "Zoe" and the heart, and Jasmine for the photo corners inside. The stamps are from Stampin' Up.


And here is the card that goes with it!


Thanks for looking!

Sunday, February 24, 2008

Way too much fun...

Sorry my blog is so outdated -- thanks to anyone still checking in! I am still feeling like garbage, but I'm officially at the end of the first trimester so I have hopes for brighter days ahead. I have been able to do a couple of really fun projects over the past few weeks that I wanted to share. I just did this one today -- my baby sister turned 18, and I needed a cool card that would match her fun and funky personality. I downloaded this great "Comic Junkie" digi-kit by Jana Crowley (the Queen of Quirk) at www.oscraps.com (that's where I got the background, cityscape, and big letter A) and the font (letteromatic) from www.1001freefonts.com. Then I found a great tutorial on turning a regular photo into comic book art at www.photoshoproadmap.com -- I can't wait to explore this site some more!


Here's what the original pic looked like:


This next project is a book I made for my brother-in-law and his fiance for their wedding -- they had one at each table. He wanted to tell the story of how they met and fell in love, but they didn't have pictures for a lot of the events. He loved the invite I made for my mom's birthday and asked if I could make them a book in that style. But of course! The second half (about the proposal) they had lots of pics for and I was out of time, so it's pretty straight forward, but the whole thing was really fun to make. Even more importantly, my BIL and new SIL said it was exactly what they wanted, and everyone in the family wanted to take one home! Ah, success....

Saturday, December 15, 2007

Birthday Party for my mom!


I've been working on the plans for a big 50th birthday bash for my mom for months, and last night was the big night! I was so happy with how everything turned out (even though she wasn't really surprised after all...).

It all started with this adorable free digi-kit by Ronna Penner, which I downloaded from www.shabbyprincess.com. I used the flowers and paper from the kit to create this invitation. I drew the dress, balloons, and body parts on white paper with a thick marker, then scanned them in so I could work with them in my graphics program. I LOVED the result -- so much in fact, that I decided to base all the decorations for the party on the colors and feel of the kit!

I made these centerpieces for all the tables using Bazzill cardstock that coordinated with the kit. I cut all the hats from the Cricut Celebrations cartridge. This was the first time I used this cartridge! I never thought I wanted it, but I couldn't resist when I found it for $25. I'm SO glad I gave in! I bought these little tin pails at WalMart and put floral foam in the bottom. I painted bamboo skewers white and added the hats to the top, then filled the pails with curled ribbon. Each centerpiece was sitting on an oversized flower that I printed from the digi-kit.


Here are a few more examples of the various centerpieces:


Here's one of my favorite parts of the decorations! I printed this 2' x 5' banner on my dad's large format printer using elements from the kit. Then I made use of my parents' huge windows and the darkness for a fun and meaningful idea -- I got one of those markers they use for writing on car windows and asked all the guests to write one word they thought described my mom. She totally loved it!


I used the base design of the invitation to make this guest book/album, bound with the Bind-it-all. All the guests signed it, and there is plenty of room for pictures. I printed the inside pages with a border and some of the flowers from the kit, so they are all ready to adhere the pics and do some journalling, and the album will be done!


After the party was over, I grabbed my favorite out of all the party hats to make a card! I created the circle card with the window using Cricut Design Studio by making two 5" circles, welding them together, then adding a 3" circle to the middle of one of the big circles. I then cut the yellow scallop (which is the edge of the card -- the brown in the background is just so you can see the yellow better) with Mini Monograms and adhered the circle card to it. I added a 4" white circle to the inside for writing. I adhered the hat to the front, added the doodle outlines with a white gel pen, and wrote "happy birthday" on the band. I love it!


Phew! I have to admit I'm exhausted, but I love how it all turned out! And the best part of all is that it made my mom feel so happy and loved, and that was the whole point!

Wednesday, October 31, 2007

What can you do with a couple sheets of patterned paper?

I first pulled out this paper to make this accordian album for my Grandpa, commemoration the big get-together we had for his 76th birthday. I had 2 sheets of each pattern (stripes and polka dots), and I had so much left over I decided to use it for cards as well! Even still, I have enough left over for an 8x8 layout, at least. You can really make a little go a long way when you're scrapping! This pp is from Wild Asparagus, and the pre-made album is from DCWV.


This fun Donald card is for the little son of a friend of my aunt's who is undergoing major surgery tomorrow. He LOVES Donald Duck. I was happy to have an opportunity to use my Disney cartridge again, and Sammy had a blast putting this card together with me. I'm definitely going to let him help me put together an autograph book for our trip to Disneyland in a few weeks!


I really don't like this last card much, but I thought I'd include it since I'm talking about how many projects you can get out of just a few supplies. This is a super quick card for a guy.

Tuesday, September 25, 2007

My first Bind-it-all project!


Yay for the Bind-it-all! I can tell I will really love it. I made this little guest book to go on a shelf in our guest room. I thought it would be so fun to have a little mini-book of all the people who come and stay with us. The book itself is about 6" x 4 3/4". The paper is from Wild Asparagus and the die cuts are all made with the Cricut. "Friends" is from Jasmine, cut at 2 1/2" (for 'friend') and 2" (for the 's'), with shadow. The tulip bunch is from Walk in My Garden, cut at 2 1/2" on border mode. The tag is from George, cut at 2" with shadow.


This is a view of the inside cover. I used the same cut from Walk in My Garden, plus a scallop circle tag from Alphalicious. "Welcome" is from Zooballoo, cut on silhouette mode at 1 or 1 1/4".


This is what the rest of the pages look like -- the left-hand side is for the guests' entry, then the right is a mat where we can put a little picture of them from their visit.


Thanks for looking!