Wednesday, September 30, 2009

Freeze Frame - Product Review

I'm happy to introduce a new feature of my blog -- the product review! I think we can all agree that fellow-scrapper-enabling is what keeps the scrapbooking industry afloat. I mean, before I got sucked (happily) into the online scrapbooking community, all my supplies fit into one plastic bin. But now, as I hop through tons of forums and blogs, I am constantly finding new goodies that I just can't live without (or discovering older supplies that are too good to let go). As a result, I have a messy, overstuffed room full of fun things just begging to be shared with the world.

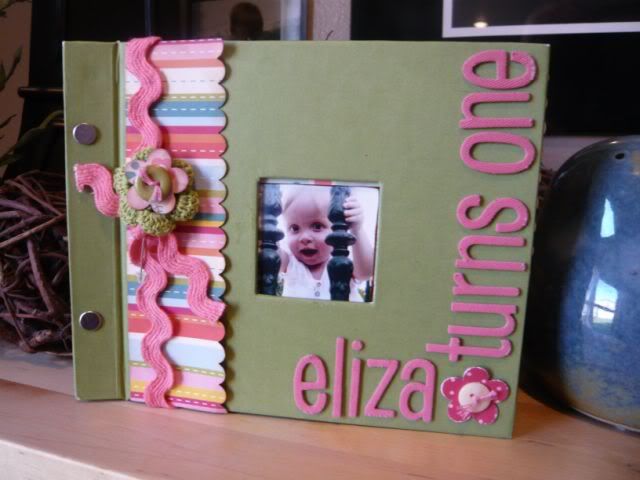
The first product I'd like to review is the Freeze Frame. I was introduced to it at the Scrapbook Expo last month, and I almost didn't buy it because I really had shot my budget all to heck, but it was such a great idea I knew I'd be kicking myself if I didn't take it home with me. Here's a video of how I used it for my first project, and I'll sum up with some conclusions below:


Pros:
-You really can glue each layer in one pass instead of trying to pick up and replace each element and get everything just the way you want it, definitely speeding up the process.
-It also helped me not lose little things like the dot for my exclamation point, which is always aggravating.

Cons:
-The adhesive mesh was very strong, and did not want to let go of the super-delicate elements on my page.
-It's a very large item, about 18" square, so you need to clear a good chunk of scrapbooking real estate to use it. I got everything mostly in place before I got it out, then carefully moved my layout into the frame, and that worked just fine.
-You do need to replace the mesh after a few months (depending on how much you use it, what kind of embellishments you use, etc.)

Conclusion: For me,the fun part of scrapbooking is creating the elements and arranging everything just so. Getting all the little bits and pieces adhered down can be a pain, and the Freeze Frame made that part a snap. Definitely recommended if you have a big enough desk -- I think I'll get a ton of use out of it.

Rating: 3 out of 4 stars
Price: MSRP $29.99 (I got mine for about $20 at the Scrapbook Expo, and I noticed several online shops had prices in the low-mid $20 range.) Replacement mesh is about $6

Wednesday, September 23, 2009

Another way to win a Gypsy!

Wow, the Cricut world is all a-buzz with news of the new Cricut Gypsy. I just found this great site called Cricut Cartridges Helper, and they're also giving away a free Gypsy! Just visit the site to find out how to win a Cricut Gypsy, then look around and see all the great advice and help they have for Cricut users!

Friday, September 18, 2009

Eliza birthday party goodies!

Alright, it's been a couple of weeks now since our sweet little Eliza turned one, but I was holding off posting these projects until I could get her little birthday album finished. I can't believe my baby girl is one already! She is such a little dolly. I really had fun decorating and getting ready for her birthday -- it's just delightful having a girl to papercraft for!

I decided to go with a garden theme for the party, and I found this ultra-adorable "Girl Friday" collection from Cosmo Cricket. I used it to make this invitation for her party:


I even used my Cricut to cut out the little "e" applique for the onesie she's wearing! It was really easy -- if you haven't tried it yet, do a YouTube search for Cricut fabric and there are several good tutorials.

Then I went to town on some fun decorations. I made this banner using the Celebrations, Alphalicious, Home Decor, and Walk in My Garden Cricut cartridges, as well as a cute felt flower from Fancy Pants:


And these very fancy-looking but very quick-and-cheap-and-easy (my favorite combination!) tissue paper flowers using a tutorial from good ol' Martha Stewart:


I loved the banner and flower-poofs so much that they are now hanging in Eliza's room, and I think I may re-do the whole thing based on them! Yes, I know I'm hopeless...

My awesome cake decorator sister Amy came over and helped me make gum paste flowers to top the cupcakes for this cupcake tower. The pics do not do this one justice -- they were so stinkin' adorable.


I started this little album before the party and had everyone who came write a little note to Eliza. Afterwards I put in some pages with the pictures from the party and some with the portraits I took for her birthday. I got the little green album from Target for $1! I used that same Cosmo Cricket paper, and I used my SU scallop edge punch to add a scalloped border to each of the pages. This started out being more functional that decorative, because the pages were 6 1/2" wide and I was being economical with my paper, but I love the effect.


Phew! Thanks for hanging in there through all these pictures! I had a ton of fun with all these projects. So fun to spoil my baby girl!

Monday, September 14, 2009

Cricut celebrates its 100th cartridge!

For all my Cricut buddies out there, make sure you get in on the celebration on the MB over at Cricut.com! They just released Winter Woodland, which is their 100th cartridge, and to celebrate they are giving away 100 cartridges. Check out this link for all the info -- you get two chances to win!

http://www.cricut.com/shopping/ProductDetails.aspx?id=361&s=1&sc=2

Good luck, y'all!

Tuesday, September 1, 2009

A sweet little birthday card...


Sorry I've been so slow on posting -- I've been spending the last couple of weeks getting ready for baby Eliza's first birthday! (Not to mention Sammy starting kindergarten, Dan turning 30, plus all the other things life throws at us...) I haven't gotten the pictures of all the stuff I did Eliza's party ready for posting yet, so I thought I'd post this little birthday card in the mean time. My sweet little niece Amelia also turned one a couple of weeks ago. She lives all the way in England (sadness!), but I actually had it together enough to send her a card and present in time fore her birthday (gasp!). For someone who loves to make cards, I am really awful about getting them off in time. And there's my confession of the day.

I used an Autumn Leaves pp and ribbon set for this card, and my Cuttlebug for the embossing. Cricut cuts: I cut the number with Alphalicious and the tag with TBBM, then the little ladybug with Walk in My Garden. First time I've used that cart in a long time, but I think now that I have so much little girl stuff to do I'll be digging it out more often. The flowers on the ladybug are a punch. The pin is from Fancy Pants. This card is a great example about how sometimes you just have to go with the flow -- I originally started out with a great sketch from 2 Sketches 4 You, but this darn card would not behave itself, and the finished product bears no resemblance to the original sketch. TFL!